Creating Additional Site in SecuRemote/SecureClient
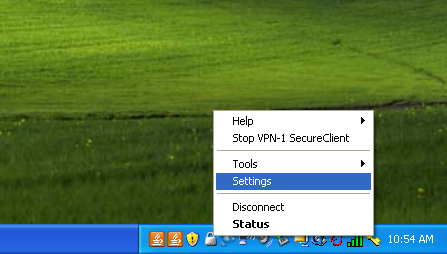
To create more site, right click the SecuRemote/SecureClient icon in your system tray.
Choose "Settings"
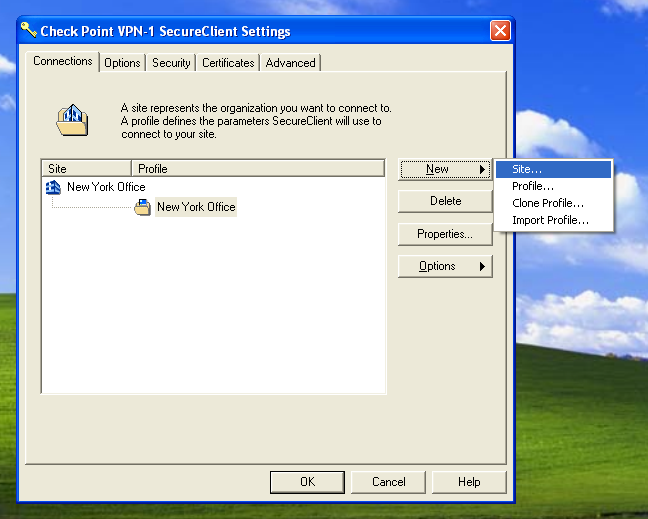
On CheckPoint VPN-1 SecureClient Settings, on the right side, click "New" and choose "Site..."
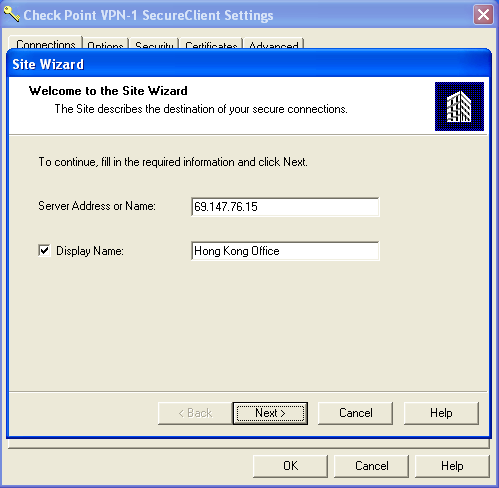
In "Server Address or Name", type the IP address of the second (or third, and so on...) site you want to connect. Check the checkbox and in "Display Name", type another name that will identify your site for you to recognize and distinguish each site very well. In this example, it is "Hong Kong Office".
Click "Next"
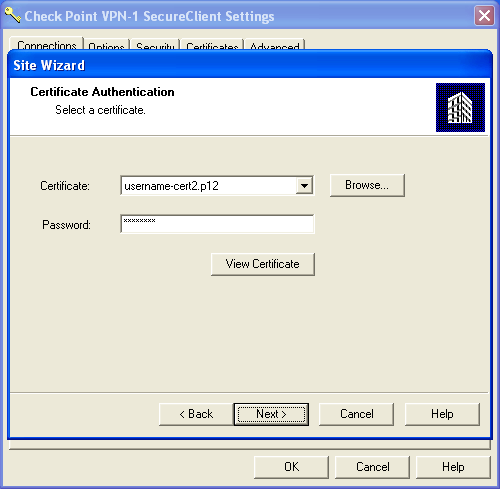
Browse the corresponding certificate for this site. Type in your password and click "Next".
*Once again, this certificate file is usually given to you by your network administrator accompanied by password and usually follows this naming convention: <username>.p12.
*Note: Once you browsed your certificate from a certain location, you should not change or delete it from its current directory. Otherwise, you will get an error and need to browse the certificate again.
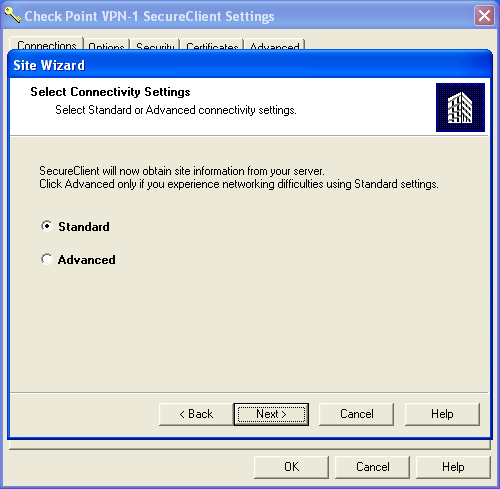
Choose "Standard" and click "Next"
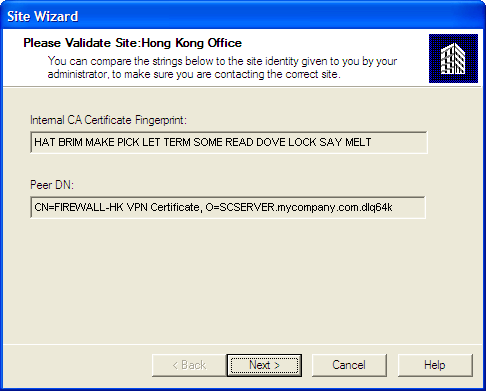
Please validate Site: Hong Kong Office.
Click "Next"
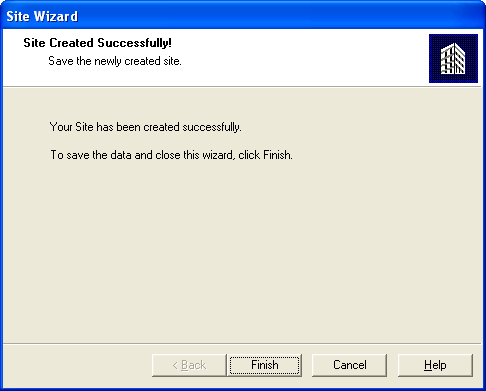
Click "Finish"
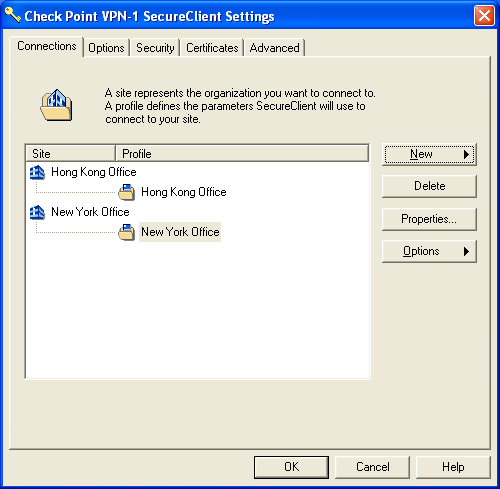
You have now defined two sites in your Checkpoint SecureClient. Click "OK" to save and close SecureClient Settings.
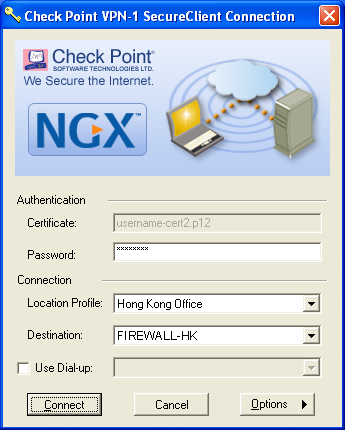
In the "Location Profile" drop down menu, you can see the two sites that you have created. From there, you can choose from the site you wanted to connect.
To connect to the second site, simply click the drop down button and choose the second site you created (In this example, Hong Kong Office). In destination field, choose the particular firewall you want to connect to (In this case, FIREWALL-HK)
Checkpoint SecureClient automatically looks for the certificate for a particular site defined.
*When you enrolled/browsed your certificate during the site-creation process, SecureClient stores the filename and the directory of your certificate to its registry. This is the reason why it is not advised to move or delete your certificate a different directory after creating your site.
*Note: In this tutorial, the authentication method that was used is certificate verification. There are other types of authentication methods available for Checkpoint SecureClient such as Username and Password, SecureID, and Challenge Response.

Type in your password to this particular site and click "Next"
*Note: Password for this site (Hong Kong Office) might be different from your password to other site(s) (New York Office)
Connection succeeded - Click "OK"

Congratulations! You are now connected via VPN and will be able to access internal resources of your Company.
To create more sites, just repeat the steps above.
Click here to learn more.